Glassfish 4 allows for easy browser based setup of multiple domains each serving different web application using domain's root URL or any arbitrary subpath as document root. Similar setups can also be done with JBoss and Tomcat. Let's see example deployments with Glassfish 4.
In this scenario we will setup 2 different web application at root URLs of 2 different domains:
glassfish1.jvmhost.net -> glassfish1.war
glassfish2.jvmhost.net -> glassfish1.war
Note the term domain has a bit different meaning in Glassfish terminology and means an administrative domain. Here we use default domain1 Glassfish domain and refer by domain to DNS domains.
We assume you have pristine Glassfish 4 installed with admin password set and remote access to GlassFish Server Administration Console enabled. If you have not done it already see instructions at the bottom of article.
The WARs used are slightly modified sample.war provided by Tomcat project. Our primary domain in cPanel is glasssfish1.jvmhost.net and secondary (Addon) domain is glassfish2.jvmhost.net. Both domains are fully (using catch-all mapping in Java Control Panel) proxied (mapped) to Glassfish. At the starting point both domains display the same content namely Glassfish default page. Let's go.
Deploy sample web applications
Copy
glassfish1.war
glassfish2.war
to ~/appservers/glassfish-4.0-web/glassfish/domains/domain1/autodeploy
In a moment 2 files will show up in the directory:
glassfish1.war_deployed
glassfish2.war_deployed
Alternatively you could upload the WARs to ~/appservers/glassfish-4.0-web/glassfish/domains/domain1/applications and deploy them in Administration Console - Applications.
Verify the web applications via browser
You can use any of the domains because the WARs are not yet bound to a specific domain (virtual host). For example try
http://glassfish2.jvmhost.net/glassfish1/
http://glassfish2.jvmhost.net/glassfish2/
Now you have both apps open but they are not bound to a domain and also use application name in the path.
Set glassfish1 application at root URL of default Virtual Server 'server'
Go to Applications - glassfish1 and make sure 'server' is selected on Virtual server list and Context Root is set to '/'.
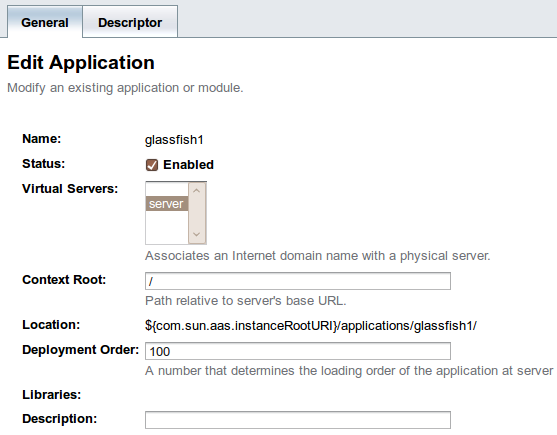
Still both domains will show the same content - now at root URL. Now we will be adding glassfish2 aplication to the secondary domain.
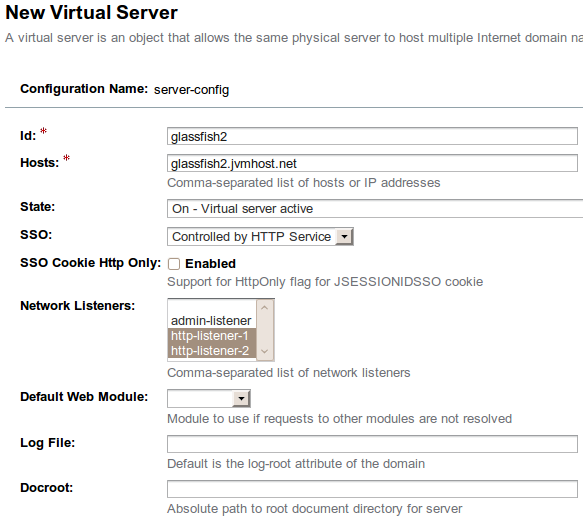
Create new virtual server for glassfish2 application
Go to Configurations - server-config - Virtual Servers - New. Set ID to glassfish2, Hosts to glassfish2.jvmhost.net and select http-listener-1 and http-listener-2 on Network Listeners list
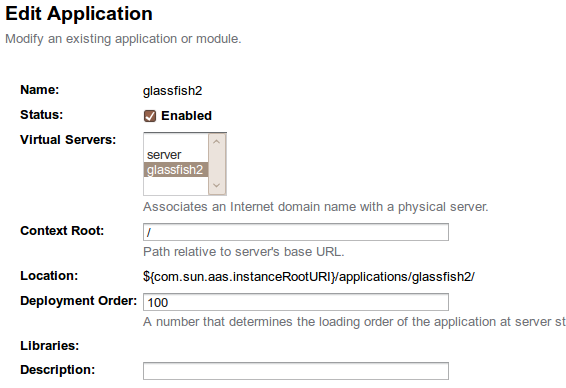
### Set glassfish2 application at root URL of the new virtual server
Go to Applications - glassfish2. Make sure the new virtual server is selected on Virtual server list and Context Root is set to '/'.
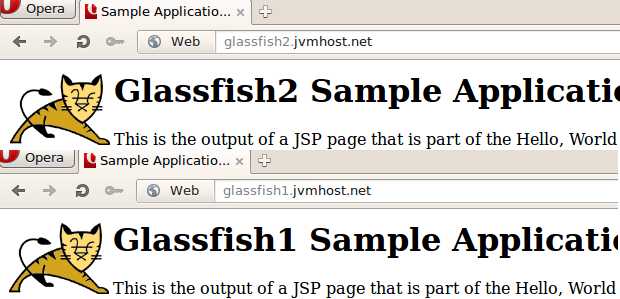
And the final result - 2 domains displaying their web applications
### Setting initial admin password and enabling remote access to Glassfish 4
[~]# asadmin --port YOURCUSTOMPORT change-admin-password
Enter admin user name [default: admin]>
Enter the admin password>
Enter the new admin password> SECRET
Enter the new admin password again> SECRET
Command change-admin-password executed successfully.

[~]# asadmin --port YOURCUSTOMPORT enable-secure-admin
Enter admin user name> admin
Enter admin password for user "admin"> SECRET
You must restart all running servers for the change in secure admin to take effect.
Command enable-secure-admin executed successfully.

[~]# asadmin --port YOURCUSTOMPORT restart-domain
Successfully restarted the domain
Command restart-domain executed successfully.
Do not hestitate to add your questions related to the article below. Next article will cover JBoss virtual hosts.